It’s nice when you can develop code and explore your database in the same development environment. It’s even nicer when it’s VS Code, where I spend a lot of my time these days.
Since I’ve been working with both MongoDB and CosmosDB for various projects, I found using the MongoDB driver a big productivity boost, and pointing it to my database (either CosmosDB or a MongoDB) a convenient boost, eliminating the constant flip between shells, apps, and mindsets.
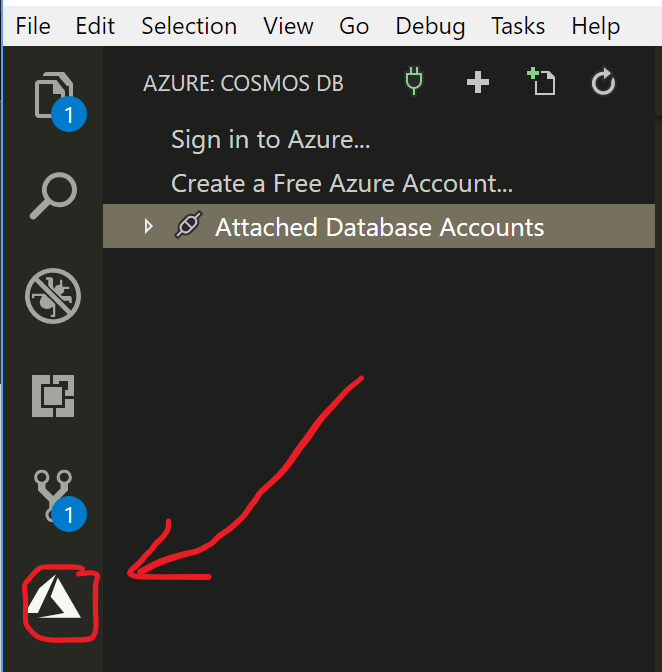
The trick is to install Cosmos DB Support for VS Code extension in VS Code. Once installed, it enables another icon on the VSCode activity bar.
Connecting
 Expanding that side bar gives you a tree view for the databases (yes, plural: you can have several connected at once).
To connect to a database using connection credentials, you invoke the CosmosDB: Attach Database Account command. Next, VSCode will ask you which interface you would like to use.

This is the great part: If you want to connect to a native MongoDB server, choose MongoDB as the interface, then paste in any* valid MongoDB url!
Although the extension is labeled CosmosDB all over the place, it uses the MongoDB driver for making MongoDB API connections to CosmosDB instances that have MongoDB API enabled. This means it works just as well for native MongoDB databases!
If connecting to a CosmosDB instance, the easy connection option is to attache by signing in to Azure. Hit the “sign in to Azure” link. This will pop up a toast notification in VS Code, telling you to open a browser and enter a nonce code into the web page prompt. The web page will then let you log in to Azure, and once that’s done you can close the browser. If everything went well, a list of your Azure subscriptions under that account will appear in the tree view. While this option is nice and true to Azure account provisioning form, it is not always a good fit for development shops that provision connection string based credentialed access, but don’t allow developers direct portal or azure resource access beyond that.
Data Interaction
Once connected, you can see a listing of databases and collections in the tree view. To see some documents, double click a collection name. A listing of documents will appear in the tree view.
Double a document, and you will see its JSON representation as a docked tab, letting you visualize the document content with full JSON, outlining, and extended type support. Extended JSON represents the underlying BSON native types with full round trip fidelity.
{ |
In the above document sample, the field _id contains an ObjectID type. Extended JSON writes it as an encapsulated value using the $oid field name. Similarly, the field born is assigned a BSON date type, represented with a $date value field containing a canonical string date representation. This is an important thing when you deal with money for example, so that the decimal resolution and math operations on the field would be correct, which is why you should use $numberDecimal - a high precision decimal - rather than a double data type.
Document Editing
When you open a document to view its content, you actually created a Document Tab. These tabs let you modify the single document using the full power of the IDE. JSON linting, outlining, formatting, syntax highlights - all those help you visualize and understand your document better. But you can also make modifications to the data! You can change fields and their content to shape the document to your liking. When done, you can update the source database 2 ways:
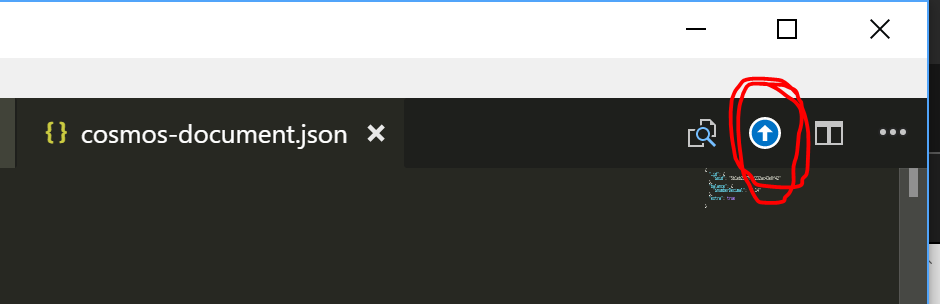
- Using the Update to Cloud button
- Using the File-> Save command ([CTRL] + S)
If you use the Update to Cloud button, the update will be carried out, and an output log line in the Output tab for the CosmosDB category will be revealed, showing the DB, collection name, and document id in URI-like format
10:49:12 AM: Updated entity "127.0.0.1:27017 (MongoDB)/db1/peeps/5b1eb2127f0f232ac43e0f42" |
If you use the File->Save method, a toast will appear first, to make sure you actually meant to update the database.
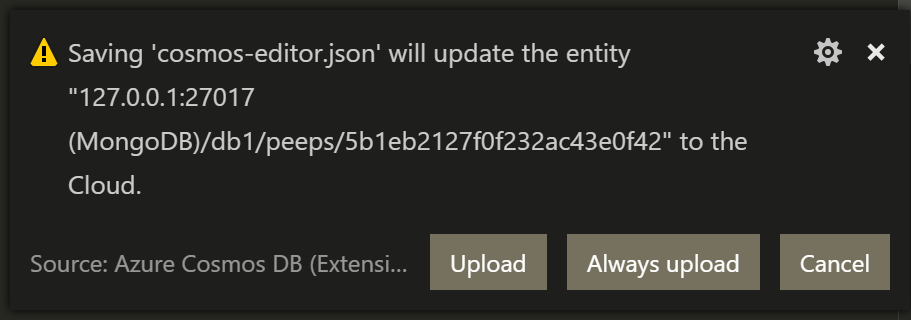
The subtlety is that you may have inadvertently requested saving all documents - including the edit - but do not want to actually update the database. This can prevent some class of accidental modifications. You do have the choice to dismiss these warnings by choosing the Always upload button on the toast.
Beware that when you “Update to Cloud”, the content of the document in the tab will completely replace any and all values in the target database. Fields that exist in the database but not in your tab will be removed. If anyone else made changes to the database since you loaded it into VS Code, those changes will be gone. MongoDB provides “patch” like surgical updates, touching individual fields, but those are not available in single document update.
Scrapbook Support
Unlike the single document tab, Scrapbooks let you perform arbitrary Mongo shell commands against a connected database. This is where you have more control over updates, and can perform several operations rather than just slam update a single document.
Contrary to the ephemeral connotation of the name “Scrapbook”, they can actually be persisted. Saving a scrapbook creates a new file in your root folder of the project, with the extension .mongo.
To get a scrapbook started, either choose the “plus-document” icon from the tree view banner, or invoke the VS Code command “Cosmos DB: New Mongo Scrapbook”.

This will prompt you to connect anew, or choose an attached instance.

Choosing to select an already attached instance, will further list the currently connected instances.

Choose one of those, and you’re presented with a listing of the databases.

Choose a database (or create a new one), and you’re in business!
The scrapbook surface is a persisted file containing MongoDB shell commands. Because it is persisted in the file tree, you can save it, edit it, and most importantly: version it! Source control is a great way to ensure your scripting of data access tasks is durable, repeatable, shareable and maintainable.
With the scrapbook, you are not limited to touching one document. Updates can span multiple documents using the update() or updateMany() collection syntax, and bring you the full power of advanced update operators like $addToSet, $inc etc. Any other shell command is available, so you can also remove documents, insert some, write some light javascript code to fetch and manipulate - anything you need.
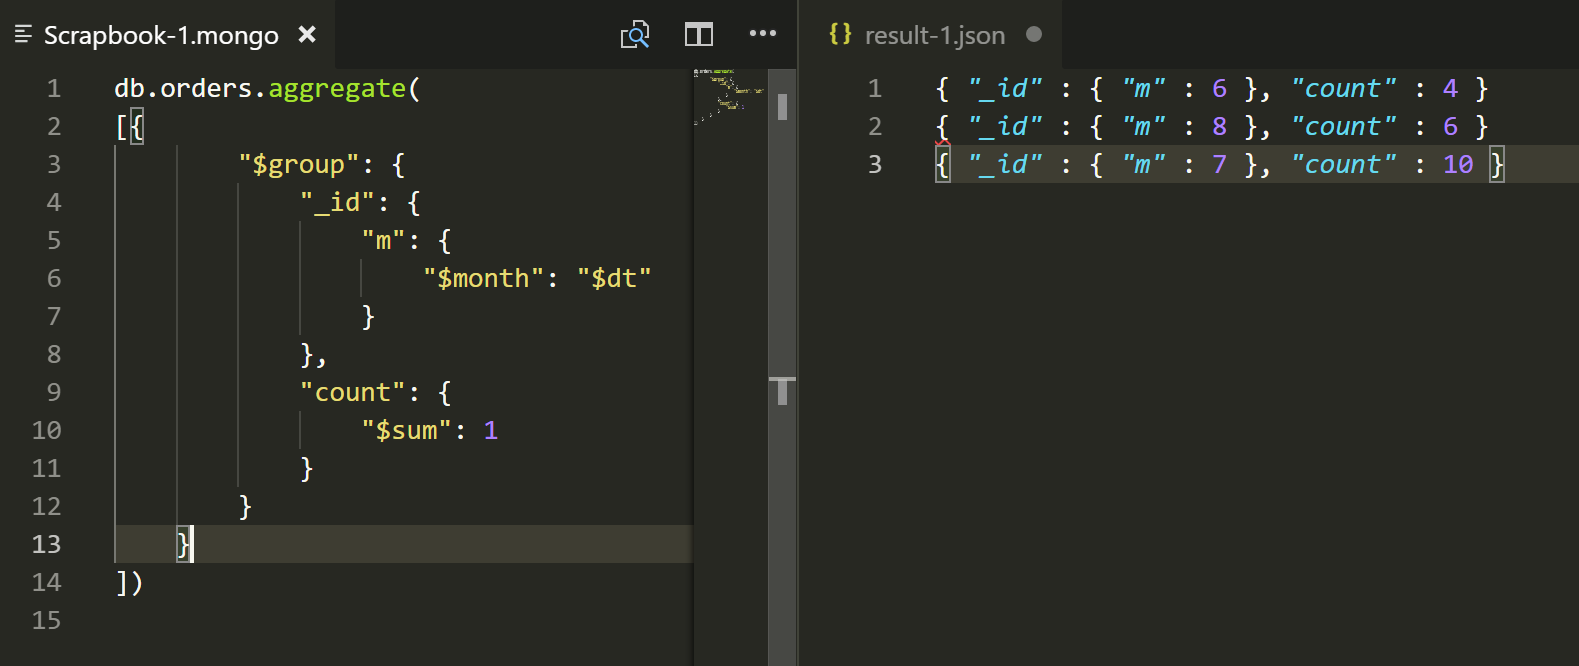
Below, I scripted an aggregation query to find out number of orders per month in my “orders” collection. Hitting [CTRL] + [SHIFT] + ; executes the scrapbook in its entirety. (You can also execute only a portion of the code in the scrapbook: Select the code to run, and hit [CTRL] + [SHIFT] + '.)
Overall, the tight integration into a the IDE is a great convenience. I’m not ready to ditch my MongoDB shell yet, but not having to switch back and forth as much for daily simple tasks is awesome.
If you are working with CosmosDB with the graph interface, this extension lets you visualize graphs graphically. If you are working with the SQL document interface, it lets you connect in that mode as well. This extension is quite powerful, and has a much richer UI and options - certainly exceeding what its simple name suggests.
* Current extension version requires that the MongoDB url begins with mongodb://. While this works for most, it prevents using the perfectly valid prefix mongodb+srv:// used by some hosts. I submitted a pull request for this issue. Once merged, mongodb+srv:// should be usable as well.